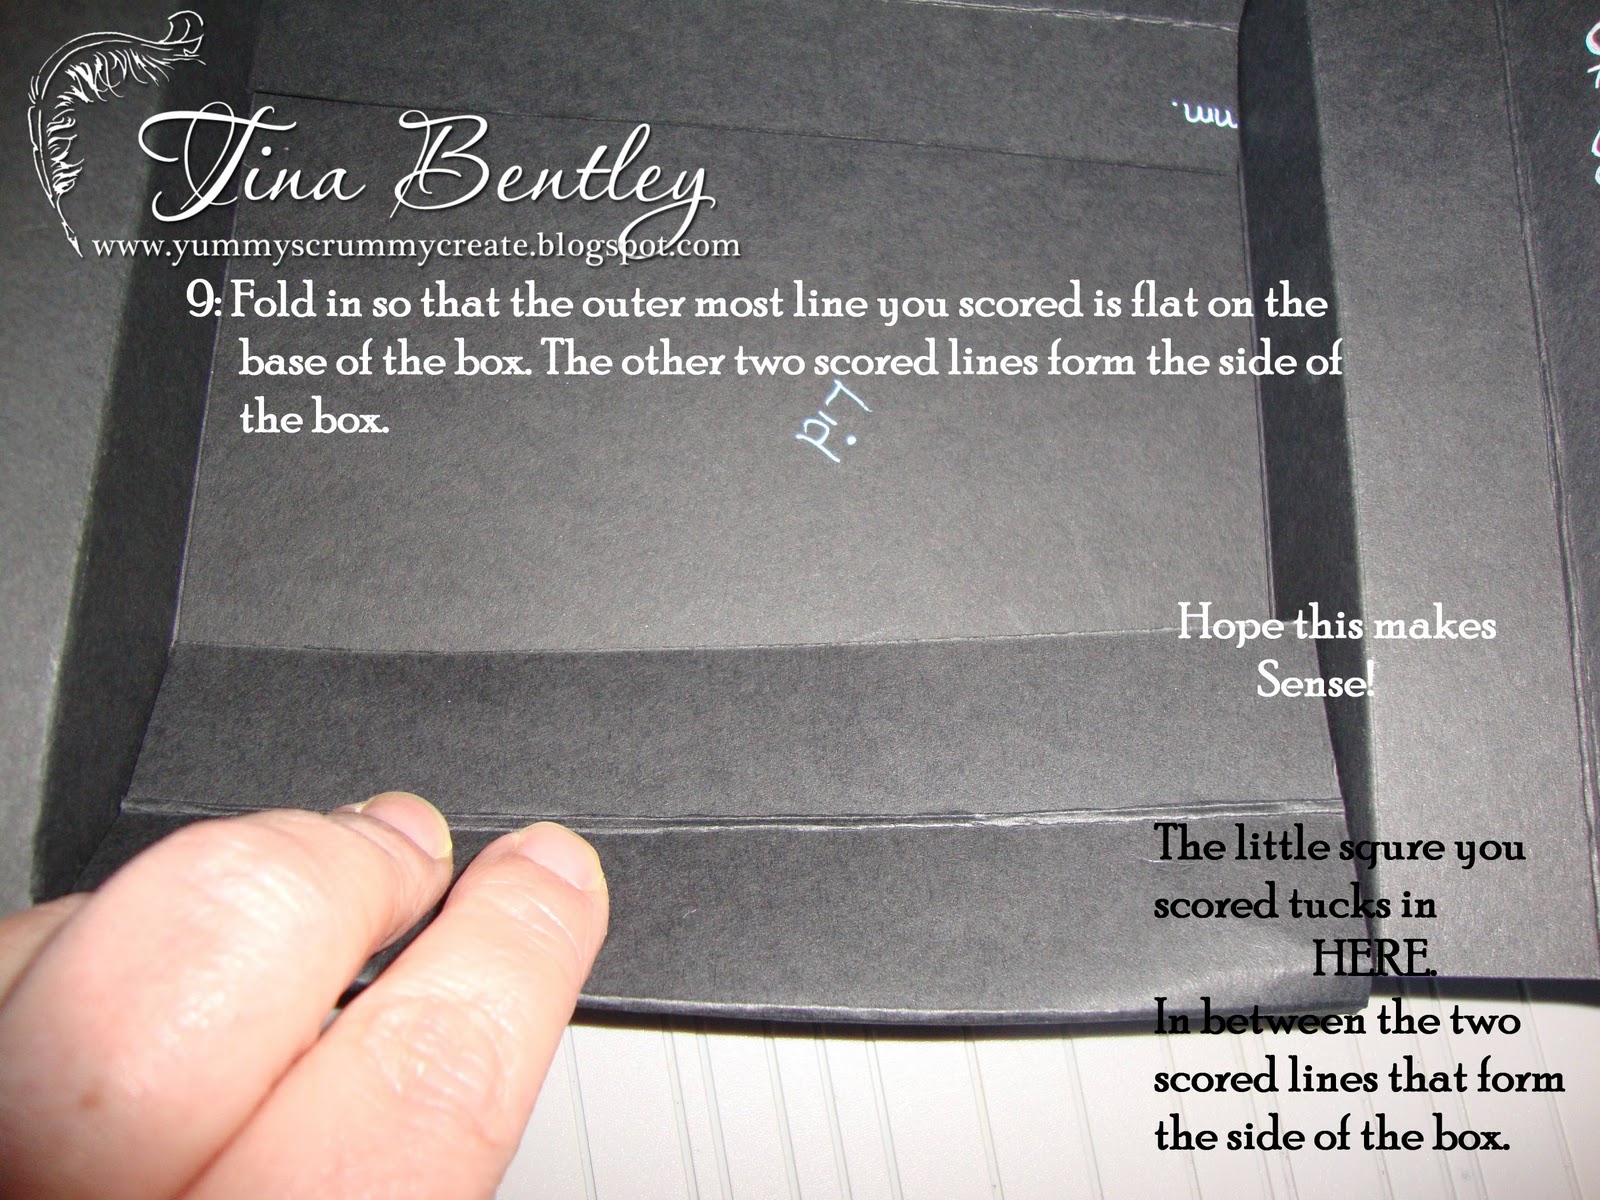
There are lots of pictures in this tutorial, click on each photograph, I have written instructions on each of them. I hope you find this useful...
I am writing this post after having my tummy warmed by what I call a nursery dinner.... sound strange, well we usually have some kind of meat or fish with pasta, or potatoes and lots of veg... but today I had boiled potatoes, garden peas and cod fish fingers.... with ready for it, tomatoes sauce... when I was a girl I had it at my nannan's on a Friday with home grown beetroot....we had to do with some beetroot pickle that we made last summer today but never the less, it was soooooo yummy...I know it does not sound it but, I am sat back very  contented.... pathetic maybe but I am happy right now...hehehe....I think for most people comfort food is chocolate, but it gives me really violent headaches so I just try to steer clear, but give me beans on toast or boiled eggs and soldiers or fish fingers and I am in seventh heaven.... not all the time just when I am feeling like I need something to
 contented.... pathetic maybe but I am happy right now...hehehe....I think for most people comfort food is chocolate, but it gives me really violent headaches so I just try to steer clear, but give me beans on toast or boiled eggs and soldiers or fish fingers and I am in seventh heaven.... not all the time just when I am feeling like I need something to
cheer me up and it did.....on to the craft which is after all what my blog is
supposed to be about...LOL
I have been making cards for a very long time, about nine years all in all, I only came to stamping about three  years ago, but, with breaks for health reasons I guess you could say that it has been less than that for stamping... About two years ago I started to create mainly six by six inch cards or just under more like five and a half by five and a half. When I use boxes to give them anyway... Which brings me to
 my point, I used to buy my boxes, they are expensive, and about a year ago a friend asked me to make six boxed cards. Now I do not charge friends for my cards so I thought ooohhhh errrr Mrs! that is going to be expensive six boxes were going to cost nearly a tenner... That is when i decided to use the design, alter it a little and make my own. Now I would not show
 years ago, but, with breaks for health reasons I guess you could say that it has been less than that for stamping... About two years ago I started to create mainly six by six inch cards or just under more like five and a half by five and a half. When I use boxes to give them anyway... Which brings me to
 my point, I used to buy my boxes, they are expensive, and about a year ago a friend asked me to make six boxed cards. Now I do not charge friends for my cards so I thought ooohhhh errrr Mrs! that is going to be expensive six boxes were going to cost nearly a tenner... That is when i decided to use the design, alter it a little and make my own. Now I would not show
this and say it is my design, as it is not...I just altered an exsisting design... However I hope it comes in handy for those who use it.
I have taken some photographs of me making one of these boxes so that others can hopefully save money at a time when everybody is trying to watch the pennies... Rach over at Papercrafts by Rach has blogged that she too was going to post a tutorial for a box, now please do not think I have just
 gone ahead and put my tutorial on here without getting in touch with her...I really do admire what Rach has done in three years, her work is amazing. The first thing I did when I realised that she too would be posting one, was get in touch and ask her if she would prefer I did not post mine... Rach very kindly told me to post my box after we both realised that ours where
pretty much the same kind of box. Rach also gave me a tip that I will pass to you, if you add tape to the flaps it gives the box more strength...

.
I have added instructions to all of
the photographs and over time perfected creating them, it can be off putting when they don’t fit together properly because the card stock is too thick, I thought I would share my way of making boxes and also the pit falls and tips I have come across by making them...
I generally use two twelve by
 twelve sheets, it is a good thing if you come across cheap neutral card stock, however if you do not, then check out Craft Creations, you can buy good quality A3 card stock relatively cheaply if you buy in bulk, then again why not do what I do,
 and, share with a friend, we have
 the magazine which gives us an extra ten percent off and it works out cheaper for us that way... they also do great double sided tapes...and you get money off postage when you subscribe to the magazine which incidentally is cheap at £12 for the year.....Ideally you want a 250gsm card stock, and if you are going to
  buy bulk do not buy coloured it is much easier to add colour with papers and flowers than to take it away (what am I saying you cannot take it away...duh)
 I hope that I have not confussed you too much, and that you like this box tutorial. If you do use it, please link back to me, so that I can come and look at your beautiful creations...

Tools Used: Score Pal - Two
Sheets Black Card Stock -
Scissors - Carl Hand Trimmer With Perforating Blade - Tape